Maps
To initiate the process to import your map or floor plan. Navigate to the ‘MAPS’ container on the left sidebar and click ‘Maps’. From the top navigation bar, select "ADD" to initiate the configuration process. A dialogue box will appear. The configuration process includes the following tabs: Configure General Settings Tab, Map Layout Editor, and the Groups Tab.
Configure General Map Settings - The first tab to be completed is the Configure General Map Settings. The Configure General Map Information has several required fields. Name/Description/Map Order/Site Name.
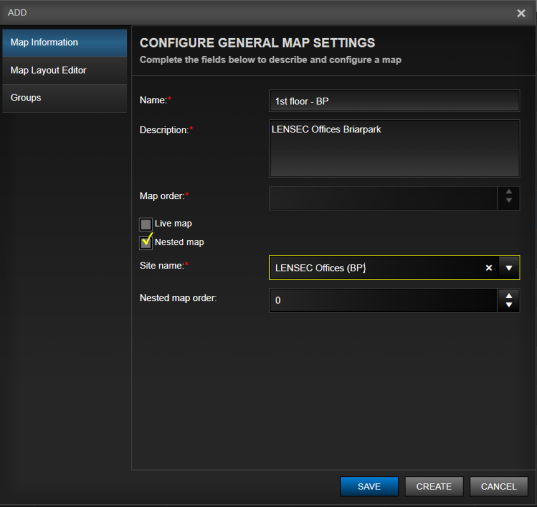
Complete the required information:
- Name: give the top-level map or floor plan a name.
- Description: Give a short description of the map for easy reference.
- Map Order: This number will assign the order in which the maps appear in the Map Module.
- Live Map: If checked, this will give you a global street map of your current, physical location.
- Nested Map: If this is your first, top-level map, leave this box unchecked. If you are uploading additional maps, you should select nested map.
- Site Name: Use only if the uploaded map is intended to be nested within a top-level map. Select from the drop-down menu the “Site” name you created to group together the associated nested maps.
- Nested Map Order: Use only if “Nested” is selected. The Nested order will follow the floor order. For example: the first floor would have a nested position of 1, the second floor would have a nested position of 2, and so on. (this creates the layers within the Sites)/
- Click "SAVE" to save.
Map Layout Editor
The second tab that will need to be completed is the Map Layout Editor tab. The first step here is to upload your map image. Simply Click the "Upload Map Image" button, find your map image from your computer and upload. You can configure the zoom increments and zoom levels of your image by selecting the zoom increments and then setting the Min and Max zoom levels. To view your uploaded map image, Click the "Download Map Image" button, to view your map image
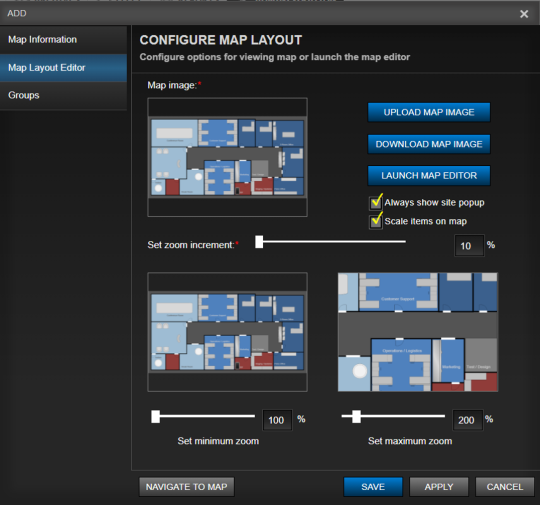
Under the Map Layout Editor administrators will configure the map view options:
- The Zoom Increment determines how many incremental zoom levels there will be, between the minimum and maximum zoom levels. You can configure the zoom increments and zoom levels of your image by selecting typing in the zoom increment or using the zoom slide bar and then setting the Min and Max zoom levels.
- Set Minimum Zoom: The Set Minimum Zoom control allows you to set the minimum zoom that can be displayed. The range is between 100% (which is the original full size of the map) to 999%, or almost 10 times the original size. Typical value for the minimum zoom would be 100%.
- Set Maximum Zoom: The Set Maximum Zoom control allows you to set the maximum zoom that can be displayed. The range is between 101% (which is just slightly larger than the original full size of the map) to 1,000%, or 10 times the original size.
- Click "SAVE" to save.
Map Customization - Administrators can select icons to enhance the map image. Simply Click the "Launch Map Editor" button, find icon image from the list and drag and drop for placement on the map.
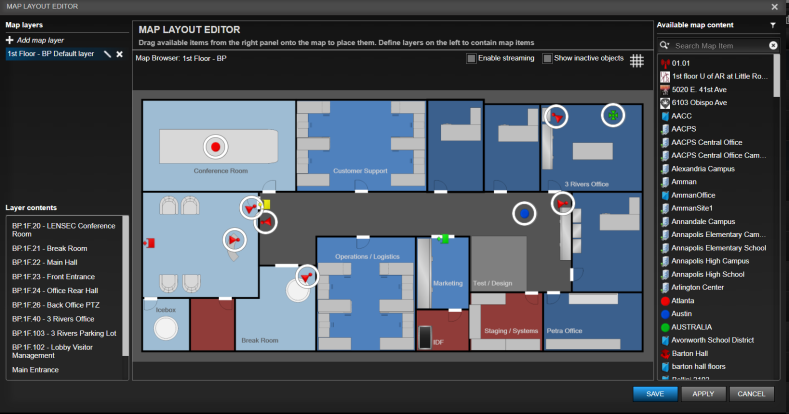
Click "SAVE" to save. all icon selections and placements.
Groups - The last tab required in the map configuration process is the Groups tab. Within PVMS, Maps are permission based. You can choose which groups will have access to the top-level map by selecting and adding the groups to the right column. Once you are sure you have completed all the information Click "SAVE".
_533x501.png)
Note: Once the map has been successfully imported into PVMS, administrators can further customize the map to incorporate dynamic graphical icons that enhance the maps features for greater situational awareness.
Next Topic: Map Item Groups


_168x52.png)

