Devices
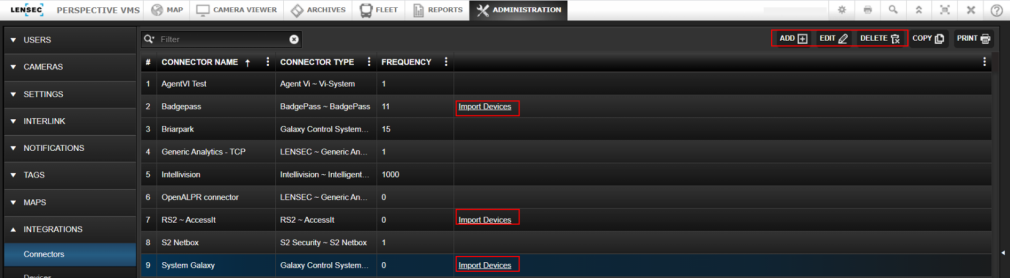
Devices - all devices that are imported from the third-party integrations will be listed under the Devices Tab. An example of PVMS Devices is access control doors. Note: Devices can be added mannually using the “ADD” key or some Devices can be imported using the Import Device hyperlink. (highlighted below)
Set Devices Basic Information - set the basic device information by completing the required fields. Connector -Administrators can use the drop-down arrows located on the right side of the data field to select from a list of available Connectors. Map Item – select from available icons to identify your device. Product Name – select name from the pull-down menu list. Device Name – name the device in our example, the Device Name = Main Entrance. Event Panel – select form the available options. Minimum log Level - set level requirement for the event. Active- check active for active devices. Select Save.
_482x399.png)
Set Advance Information - In our Main Entrance Door example - we indicate the door number as 1. Select Save
_484x402.png)
Associated Events – Set Event Association for the Device – Selecting from the left side available association events use the arrows to add one or all available options. Select Save
_485x398.png)
Associated Event Details - Set Associated Event Detail for the Device- highlight the chosen event to activate the field options, use the arrow to indicate the event detail. Administrators can choose from High, Medium and Low. Select Save
_484x402.png)
Associated Cameras - Set Associated Cameras – Selecting from the list of options use the arrows to associate individually or all camera options . Select Save
_487x404.png)
Group - Grant Group Access – Selecting from the Group list of options use the arrows to select and grant access to certain groups or all available groups. Select Save
_534x444.png)
Save and Apply – the new Device - Main Entrance will be listed under the panel display -see below
_999x288.png)
Next Topic: RFID Antennas


_168x52.png)

